Paper 3: General and Practical Techniques in Chemistry

This is a culmination of information that may be useful for the paper 3 in new specification (2015) A Level Edexcel chemistry, which will be a test of practical techniques and understanding - such as knowledge of what increases accuracy or reliability of experiments; how to construct equipment (such as reflux and distillation); calculating uncertainties... all using knowledge from topics 1-19. I used information from Units 6 and 3 of the IAL (practical papers) to inform this. (This was created before the first year of the spec so we didn't have much material to work on)

EDIT ** sorry if some of the image links are now broken as this is quite an old resource which I am not updating any more, most can be found by similar Google search**

?
  • Created by: LouiseG
  • Created on: 09-05-17 13:50

Introduction to paper 3

Paper 3 of the new Edexcel A Level is designed to test synoptic skills (ability to draw together ideas from different topics to answer a question) by applying conceptual understanding 
(i.e your ability to apply knowledge rather than just regurgitate it! - e.g., predicting a mechanism for an unfamiliar organic reaction, using the mechanisms you do already know). It will draw on your knowledge of the practical techniques you gained from the 16 core practicals that you did throughout the 2 years. 

It is worth 40% of the A Level, the largest single paper contribution, and is 2 and a half hours long (120 marks). A key part of the new spec is that maths at level 2 (GCSE) and above will be tested; at least 20% of all marks will be from maths skills. This could be something like calculating a concentration from titration information, or the total percentage error on an experiment, or knowing how to use the natural log (ln X ). 50% of all marks will be on practical techniques, which this resource focuses on. (This will be applied to knowledge from the whole specification, so topics 1-19 will need to be revised in as much detail as for papers 1 and 2; remembering that now organic and inorganic questions may be combined.) The paper will test a wider breadth of knowledge and also include more unstructured calculations and extended answer questions. 

Therefore it may be difficult to revise for, as the questions will not just test recall knowledge (e.g., what colour precipitate will iodide ions form in the silver nitrate test?) but being able to understand why something occurs in a practical procedure (e.g. why does rinsing a conical flask with deionised water between titrations not affect the titre even if some remains in the flask?) 

That all said, I've still gone and tried to create a revision material for it :D. 

1 of 71

The 16 Core Practicals

https://tinyurl.com/m2nyfkc

This is a link to the worksheets for the 16 core practicals. You may find that the "teacher" worksheets are quite useful, as they outline some of the practical difficulties you may face, which could be tested in an exam, as well as have the answers to the exam-style questions.

Another important thing to notice is the safety. Knowing how to carry out procedures safely is important and will be tested. There are all the general safety measures (wear goggles, wear lab coats...) however other specific precautions depending on the hazard. This will be dealt with later.

Make sure you know the practicals well, and importantly why each step was done. This is very significant for organic syntheses, such as the chlorination of 2-methylpropan-2-ol (CP6). In step 6, sodium hydrogencarbonate is added. You should know that this reacts with acids:

NaHCO3 + HCl ---> NaCl + CO2 + H2O

therefore could deduce that this is added to remove any unreacted hydrochloric acid. As the acid is added in excess in this practical, this is a reasonable assumption to make.

2 of 71

Safety

Working safely is about identifying risks, and planning how to reduce them. Chemicals in chemistry will come labelled with pictograms, which inform you of the hazard posed by that substance. Image result for pictograms warning

For example, ethanol is flammable. An appropriate precaution would be to keep it away from naked flames (Bunsen burners). So, in esterification, you may heat your carboxylic acid and alcohol with a heating mantle, or using a bunsen burner but with a water bath. Concentrated ammonia solution should be handled in a fume cupboard, wearing gloves. The gas is toxic and the solution corrosive. Note that concentration does matter- for example, an acid may be corrosive at high concentrations but an irritant when dilute. Sometimes you may have to evaluate why a "hazardous substance" in fact does not pose much of a risk in an experiment, such as a flammable liquid. Answers are often to do with the fact only very small (or dilute) volumes are used, so the risk of a large fire or explosion is low.

3 of 71

Hazards and risks

hazard is the potential something has to cause harm - for example, HCl being corrosive. The risk is the damage that hazard could realise, for example, HCl getting into your eyes and causing harm or blindness. The control measure would be to wear goggles. Remember to treat all unknowns as potentially hazardous (core practicals 7 and 15). Know the common control measures and when to use them:

  • Wearing goggles: In every experiment. Even something that may not seem dangerous, like water, becomes a hazard when heated - hot water could splash in your eyes, for example, and cause burns. It is important to wear goggles when handling harmful, toxic, corrosive, oxidising, flammable substances. 
  • Wearing nitrile gloves: Important when handling corrosive/caustic, harmful and toxic substances, such as 2-methyl-propan-2-ol.
  • Wearing heat resistant gloves: When handling hot apparatus such as flasks that have just been refluxed (C.Practical 16, producing aspirin). 
  • Using a fume cupboard: When you have toxic, corrosive and irritant volatile liquids, such as ammonia solution or concentrated HCl; or very fine solid powders which could be breathed in (sodium dichromate is a carcinogenic fine powder). For less hazardous substances, like lower concentration HCl, a well-ventilated room may be enough.
  • Using a water bath: When a substance is flammable.
  • Cooling a mixture: when the reaction is highly exothermic, particularly when there are acidic reagents (e.g. H2SO4) which may "split" out of the vessel. (The acid is also added slowly to the reaction vessel, not the other way around, so you can control the reaction better).
4 of 71

Further control measures

Other classic control measures include:

  • Fill a burette from eye-level: put the stand on a low chair, so that you do not overreach. 
  • Heat volatiles under reflux. So that the products do not escape as gases into the room
  • Support apparatus with clamps and stands, so that the apparatus does not collapse
  • NEVER seal reflux apparatus - this could lead to a build up of gas which may be explosive
  • Use anti-bumping granules when heating - this ensures that boiling is smooth (by promoting small bubble formation), and that certain areas aren't becoming "superheated". 
  • Consider where bungs go and don't go! In reflux, as mentioned above, the system is not bunged, however in distillation - the still head (which connects the flask to the condenser) has to be sealed, overwise the gaseous product would escape before it condenses down the side-arm condenser. In the 2016 As, the examiners' report concluded that students couldn't draw setups with correct sealing; for example in the carbonate test many drew the tube with limewater as sealed. This is incorrect as the potential build up of gas could crack the tube. The delivery tube should be placed into the solution, but not sealed in it.
  • During thermal decomposition, where the gaseous product is tested with limewater, the delivery tube must be removed from the limewater quickly after heating to prevent a vacuum forming which could crack it.
5 of 71

Core technique #1 : Reflux

Image result for reflux setup diagram (http://what-when-how.com/wp-content/uploads/2011/06/tmp1703_thumb1.png)Image result for reflux setup diagram

Reflux is used for the prolonged heating of volatiles that would otherwise escape the reaction vessel as gases. An upright condenser is fitted over a round or pear-shaped flask, which is heated by a bunsen burner (often with a water bath) or heating mantle. Important notes include: water goes in the bottom and out the top of the condenser (so it is forced through); anti-bumping granules should be used to ensure smooth boiling; the apparatus should be sealed around the condenser and flask but NOT at the top, otherwise gases could build up to a dangerous pressure. Your products should not escape out the top as they should condense before reaching it.

6 of 71

Core technique #2: Distillation (Simple)

This is a technique used to separate compounds with large differences in boiling points (ideally over 25oC). It is the quickest form of distillation. The setup is similar to reflux but with a sidearm condenser. The top is now sealed (otherwise the gases would escape) but the opening on the receiving adaptor prevents pressure build up. Ideally, a pure product should be collected at just +- 1oC of its data book boiling point. Note again that water is forced through the condenser against gravity. The thermometer's bulb should be opposite the mouth of the condenser to measure the temperature of the gas just distilling over. Sometimes in place of the thermometer, there may be a vessel (a "dropping funnel") which delivers the reactant slowly into the round-bottomed flask throughout the reaction (distillation with addition)

Image result for simple distillation diagramImage result for distillation with dropping funnel (http://classes.kvcc.edu/chm220/Images/steamdistillation.jpg)

7 of 71

Core technique #3: Steam distillation

This is used to separate an insoluble liquid from an aqueous solution. Steam is passed into the vessel of a setup similar to distillation to agitate both layers, bringing more particles to the surface of the mixture so they evaporate more easily, below their boiling point. This fact means it can be good for distilling substances that decompose on heating, as the risk of this is reduced at lower temperatures. The product distills with water so it will have to be purified further with a drying agent (e.g. MgSO4, CaO).

Image result for steam distillation (http://mywadud.files.wordpress.com/2008/12/sci_mec_11c_sina_steam_distillation.jpg)

8 of 71

Core technique #4: Fractional distillation

This is used to separate more substances with more similar boiling points. The continual evaporation-condensation up the column means that the compounds will separate out better. Notice again this is sealed at the top, with a thermometer to measure the temperature of the substance distilling over. This is the slowest form of distillation, but the best at separating.Image result for fractional distillation apparatus (http://www.chemguide.co.uk/physical/phaseeqia/apparatus.gif)

9 of 71

Core technique #5: Solvent extraction

If you want to remove a particular substance from a mixture, you can use solvent extraction. A solvent which is immiscible with the solvent containing the desired product is added in a separating funnel and mixed, opening the tap at regular intervals. The solvent is chosen so that the desired product is far more soluble in it than the original one. This is left to settle into two layers. Next, you need to consider densities. The less dense substance will be the top layer. Organics tend to be less dense than aqueous solutions. Consider which layer you want, then use the tap to drain into two separate flasks. Now, the product will have to be separated again from the solvent, this time by fractional distillation. Note that the yield of product is higher if the solvent is added in small batches rather than all at once. Image result for solvent extraction diagram

10 of 71

Washing

Washing involves using a liquid/solution to remove impurities from a product. The washing liquid is chosen so that it dissolves as much of the impurities as possible, and as little of the product as possible. If a solid is washed, this could be done in a filter funnel, with the solvent poured on top and the soluble impurities taken away in the form of a filtrate. If the substance to be purified is a liquid, a similar technique to solvent extraction is used (i.e. in a separating funnel). This time, however, the solvent has been used to remove the impurity rather than the product.

An example is sodium hydrogencarbonate solution being used to "wash" away acid impurities in organic synthesis.

11 of 71

Core technique #7: Drying

Drying refers to removing water, which is often an impurity in synthesis. For an organic solid, it may be enough to simply leave it in a warm place, and then patted dry on filter paper. For organic liquids, the water can be removed with a drying agent. These are substances that will absorb the water but not react with the organic liquid, and are usually anhydrous metal salts, such as MgSO4 and Na2SO4. They look powdery when anhydrous, but become crystalline upon reaction with water. The drying agent is added until it remains powdery (suggesting it can absorb no more water - all removed). The liquid will turn from cloudy to clear. This can be done in a desiccator for an organic solid. This is a sealed container containing the wet solid, with the drying agent. As the drying agent is a solid, it is easily removed from liquid products by decantation (pouring the product off) or filtration. Image result for desiccator diagram (http://www.ecs.umass.edu/cee/reckhow/courses/572/572bk11/Image117.gif)

12 of 71

Core technique #8: Recrystallisation

This is a very important technique, which is used to produce larger, purer crystals of an impure solid product. It works on the basis of using a solvent in which some impurities are more soluble than the product, and others less.

  • The impure solid is dissolved in the minimum amount of hot solvent. The solvent is hot to ensure that as much of the product as possible dissolves. The minimum amount is used because, the more solvent added, the more product that will remain dissolved at the end of the process, decreasing the yield.
  • This solution is filtered by hot filtration, to remove any insoluble impuritiesThese are the impurities which didn't dissolve in the solvent, even at the high temperature. Your product is in the filtrate, along with the solvent and other impurities.
  • This filtrate is then cooled in an ice bath. At lower temperatures, the product is much less soluble in the solvent. As the solution is effectively saturated with the product, it will crystallise out first. Leave to cool until the solid has precipitated out.
  • This is then filtrated under reduced pressure (with a Buchner Funnel). Your product is now the solid. The filtrate contains the solvent and any soluble impurities. The solid is washed with a little more cold water or solvent. This removes any soluble impurities that may have remained on the solid and would crystallise out as it dries.
  • The solid can then be dried completely in a desiccator.
13 of 71

Filtering under reduced pressure

This is a technique which filters a solid product by using an idea of a vacuum, created by the rapid flow of water, which 'pulls' the liquid off the solid and filters it much faster. The product is placed on filter paper over a Buchner funnel, which has small holes in the funnel to draw down the liquid. This is fitted tightly over the Buchner flask which collects the filtrate.

Image result for buchner funnelImage result for buchner funnel

14 of 71

Testing for purity

Once your product has been obtained, then you will want to test its purity to check you have synthesised the right compound! For a solid, the melting temperature can be measured; for a liquid the boiling temperature. For a liquid, distillation is used to find the boiling point.

For a solid: A capillary tube (small tube of glass) is sealed at one end by placing the end in a bunsen burner flame. The open end is then pushed into a small amount of the solid. The tube is inverted and tapped so that the solid falls to the bottom. This is then taped to a thermometer and placed in an assembly containing a liquid with a higher boiling point than the substance being tested. It should also be ideally non-flammable and colourless so the melting can be seen easily. The liquid is slowly heated until the solid begins to melt. The range over which it melts is recorded. A sharp melting point over 1-2 degrees, in agreement with the data book value, suggests a pure compound. A melting range that begins lower than the databook value, and over several degrees, indicates impurities present.

Image result for melting temperature apparatus diagram (http://what-when-how.com/wp-content/uploads/2011/06/tmp30120_thumb13.png)

15 of 71

Core technique #9: Titration

Carrying out a titration properly is vital for a chemist. This came up in Year 1, but here are a summary of the key titration points:

  • Fill the burette at eye-level (mentioned before). The burette should also be washed through with the substance that will be in it, e.g. NaOH solution if NaOH will be in the burette. If water is used, this will dilute the substance, change its concentration and the titration won't be accurate.
  • Read off the bottom of the meniscus (The curved surface of the liquid) at eye level when recording titres. This is how the apparatus is calibrated. For a burette, if you read off the top  of the meniscus for both your first and last readings, it technically wouldn't matter (the difference between the values would cancel), but, for a pipette, where you take one reading, a failure to fill up to the bottom of the meniscus along the graduation line would mean the measured volume would be incorrect. Potassium manganate (VII) is a commonly used in redox titrations, but because it is a very dark purple, it can be difficult so see the graduation marks on the burette. Specially made burettes, therefore, have white markings instead.

Image result for bottom ofmeniscus along graduation line (http://images.slideplayer.com/25/8162141/slides/slide_7.jpg)

16 of 71

Titrations again

  • Use a white tile. This will allow you to see the colour change at the end point of the titration, and you are less likely to miss it. This is very important when the colour change is subtle, for example, the manganate(VII) titration the colour change is colourless- pale pink.
  • Fill the tap of the burette before the titration starts. Again, the graduation lines are calibrated to include this small volume in your titre.
  • Swirl you conical flask as you titrate. This ensures even mixing of the two reagents.
  • If any of the substance in the burette splashes onto the side of the flask rather than into it, you can wash it down to the reaction vessel with deionised water. Why? Wouldn't this dilute the reaction mixture and change the titre? Well no - the volume in your conical flask was measured out accurately before it was added to the flask (i.e. with a pipette). The number of moles, thus, is the same; regardless of the concentration. This is as opposed to the burette, where the apparatus itself is measuring the volume of reactant added. The water makes no difference. This is the same reasoning behind why the conical flask can be washed out with water between titrations. In fact, this improves accuracy, as it will remove any unreacted ions that may affect the second titration. You could wash the inside of the conical flask just as you reach the end-point to ensure all reactants have been washed in.
  • Ensure the burette is vertical, so the measured volume along the graduation line is correct.
  • Don't use too much indicator. This is especially important in acid-base titrations; as indicators are often weak acids themselves so will affect the titration result.
  • Do a rough titration first (quickly run through) then repeat, slowing down to adding drop-by-drop when you're in the range of your last titre. Repeat for concordant results.
17 of 71

Recording results

Experiments will almost invariably require results to be recorded. These may be qualitative (e.g., titre values) or quantitative (i.e. observations, such as a transition metal complexes change in colour on the addition of NaOH). Some tips for recording results:

  • For titrations, the titre should always be written to 2.d.p where the last digit is a 0 or 5. (i.e. nearest 0.05cm3). 
  • Only concordant results (for titrations, this is within 0.2cm3 ) should be used to calculate a mean.
  • Don't vary sig fig throughout the table, for example, record one result as 4.567g and the next as 8g. Consider the degree of accuracy of the equipment; your results can never be more precise than this. For example, if an experiment measures reaction time, recording a result to 4dp would be unrealistic. Human reaction time means that the times cannot be recorded to an accuracy of more than ±0.5 s.
  • Put units in the table headings, not the results themselves, and keep them consistent.
  • When stating an observation, consider carefully if your phrase really is an observation. "Bubbles produced" is an observation, but "CO2 gas is evolved" is not. That does not describe something you're actually seeing. Furthermore, secondary tests on products don't count as observations. For SO2 for example, you could say a choking gas is formed, but not the result when tested with paper dipped in potassium dichromate.
18 of 71

Mistakes, errors, accuracy and precision

Mistakes and errors are not the same. A mistake is the result of carelessness, such as spilling a product or leaving a funnel in a burette during a titration (which would drip into the burette and cause an inaccurate reading to be made). These may have been called human errors at GCSE but the term shouldn't be used anymore. Basically, mistakes are avoided by being careful. An error cannot be removed, no matter how careful you are. It is the difference between an experimental and accepted or calculated value. A systematic error is caused by equipment, and an inherent uncertainty is built into all equipment. For example, if a mass balance tared to 0.00g is actually recording a mass of -0.05 grams, then the mass measured on it will be incorrect by 0.05g every time, however, this cannot be removed easily. A random error is due to external factors such as temperature fluctuations that may affect a reaction rate, for example.

Precision refers to how similar values are to each other. 10.00, 10.10 and 10.20 are precise measurements (they are concordant). This doesn't mean they're correct (close to the true value). For example, a titration may have been done carefully, but due to a systematic error (incorrectly calibrated burette, for example), all values are too low or too high. In contrast, an accurate measurement is one that is close to the true value. Accuracy is not increased by using more precise equipment (i.e. smaller graduations), and not necessarily by repeating experiments (if there's a systematic error it won't go away on repetition) but is improved by practices such as, for example, insulating a cup during calorimetry to reduce heat loss to surroundings.

Repeating an experiment and calculating a mean reduces random error and demonstrates the repeatability of an experiment.

19 of 71

The Practical Techniques

Edexcel have set 12 techniques that students need to be able to do. These are:

  • 1.Use apparatus to record measurements, such as temperature and mass (most C.Ps)
  • 2.Use a water bath or electric heater (CP 4,5,7,15 and 16)
  • 3.Use a pH probe or data logger (CP 9 )
  • 4.Be able to use apparatus to set up a titration, reflux, distillation, filtration (including under reduced pressure) and the test for ions (most CPs)
  • 5.Use a volumetric flask (CP 2,3 and 10)
  • 6.Use acid-base indicators (CP 2,3 and 13)
  • 7.Purify a solid by recrystallisation and liquid by separating funnel (CP 5,6,12 and 16)
  • 8.Use melting point apparatus (CP 15,16)
  • 9.Use paper chromatography (CP 6,12, 16)
  • 10.Set up an electrochemical cell (CP 10)
  • 11.Safely handle toxic, corrosive, harmful and irritant substances (most CPs)
  • 12.Measure rate of reaction by a clock and titrimetric method (CP 13)

Techniques 1, 4 and 11 are the most widely used techniques. Core practical 16, making aspirin, is the practical with most techniques. Techniques 3, 10 and 12 are only found in core practicals 9, 10 and 13 respectively. (Note these are not the same techniques in the same order necessarily as on the slides I have called "core techniques", sorry if that's confusing. They will be covered on a later slide)

20 of 71

Calculating uncertainties

Even the most well-done experiment will have uncertainties, due to the uncertainties of the equipment used. The uncertainties estimated here are minimum uncertainties, those due purely to equipment. In practice, the experimenter would have to also estimate uncertainties due to their own procedural methods, and consider any other external factors that could have affected the experiment, such as temperature or humidity.

Percentage uncertainty = (absolute uncertainty / measurement ) x 100

The absolute uncertainty is often half the smallest graduation that can be recorded. for example, a mass balance that reads to 2 dp has an uncertainty of +- 0.005g. This is as masses of both 1.445g and 1.435g would be recorded as 1.44g on this balance. Therefore the recorded value is 1.44g, but it could be anything between 0.005g more or 0.005g less. However, in equipment where you make a measurement - i.e two readings (such as a ruler, mass balance (zero reading counts as a reading) or burette) the absolute uncertainty is multiplied by two. This is as there is an uncertainty on both measurements. So, for example, if two burette readings (which are recorded to the nearest 0.05cm3) of 4.35 +- 0.05 and 5.60 +- 0.05 are made, then the volume of the titre would be 1.25 cm3 ; +- 0.1 cm3. Thus the percentage uncertainty would be 0.1/1.25 x100 = 8%. 

21 of 71

Applying uncertainties

it can be seen from the example on the last page that if a greater value is recorded (e.g. a larger mass, a larger titre, etc) then, although the absolute uncertainty remains the same, the percentage uncertainty will be lower. For example, if you wanted to reduce your percentage uncertainty on a titration acid-base, you could dilute the reactant in the burette by a known amount. A greater volume would be needed for the same number of moles, thus a smaller percentage uncertainty.

Combining uncertainties

When values are added or taken away (e.g., the burette readings are taken away to find the difference - the titre), absolute uncertainties are added. (This was the multiplying the +-0.05 by 2 to get +-0.1cm3, alternatively seen as 0.05 + 0.05 = 0.1) The total percentage uncertainty was then found by dividing this number by the measurement and multiplying by 100.

When values are multiplied or divided, for example, to find a concentration of an unknown substance in a titration you need to do volume concentration of the known substance and then divide by the volume of the unknown; percentage uncertainties are added. So, in practice, to find the uncertainty of a final answer in an experiment (such as on a mass of product collected), the percentage errors of all the equipment used are added up. These errors, of course, depend on the measurements taken using each piece of equipment.

22 of 71

Pipettes and volumetric flasks

Some equipment you can't calculate absolute uncertainties from easily because you take a reading, not a measurement. The difference is, in a reading you take just one value. There is no zero error. Therefore the equipment has no "smallest possible reading", but instead just one graduation mark- the key examples are the graduated pipette and the volumetric flask. In these examples, the uncertainty will be given. A pipettes may be quoted as +-0.06cm3, and a 250cm3 volumetric flasks is +-0.3cm3. In calculating the percentage uncertainty, these values are not multiplied by two. Volumetric flasks thus have very low percentage uncertainties, 0.3/250 x100 = 0.12%

Of course, this is still just the minimum uncertainty.  Good practice techniques to keep preparing a standard solution accurate (and thus the uncertainty low) include:

  • Accurately weighing the primary standard by measuring the difference in mass of a weighing boat before and after the standard was weighed. (calculate what was transferred).
  • Dissolving the primary standard in a small beaker with deionised water, stirring and transferring all washings to a volumetric flask (from the funnel, stirrer, beaker etc)
  • filling up with deionised water until the bottom of the meniscus reaches the graduation point at eye level
  • Stoppering and inverting several times slowly to ensure even concentration.
23 of 71

Choosing the right equipment

Standard chemistry equipment can sometimes all do the same task, for example measuring cylinders, pipettes and burettes can all be used to measure out a volume. Which one is appropriate depends on the measurement you are taking.

  • If the substance is in excess, i.e. the volume (and how exact it is) is more inconsequential, then a measuring cylinder would be quickest to use.
  • If a small, accurate volume needs to be measured, such as 5.00cm3, then a pipette or burette is more appropriate. It is usually a pipette which is used in titrations to measure out accurate volumes of the substance to be titrated, they come in set sizes such as 25cm3 and 10cm3; whereas burettes are used when multiple volumes need to be transferred.

Also, remember that:

  • Volumetric flasks are used to produce very accurate volumes, usually in making standard solutions.
  • Round and pear-shaped flasks are used in reflux and distillation.
  • Conical flasks are used to contain volumes such as an acid being titrated against. Their narrow necks mean they can be easily stoppered, for example with wool or a bung. Also, liquid that splashes up the sides is more likely to fall back down the angled sides and into the vessel during the titration compared to if a straight-sided beaker was used.
24 of 71

Summary of key terminology

Validity A measurement is valid if it measures what it is supposed to be measuring – this depends both on the method and the instruments.

True value The value that would have been obtained in an ideal measurement – with the exception of a fundamental constant the true value is considered unknowable.

Accuracy A measurement result is considered accurate if it is judged to be close to the true value. It is a quality denoting the closeness of agreement between measurement and true value – it cannot be quantified and is influenced by random and systematic errors.

Precision A quality denoting the closeness of agreement (consistency) between values obtained by repeated measurement – this is influenced only by random effects and can be expressed numerically by measures such as standard deviation. A measurement is precise if the values ‘cluster’ closely together.

Repeatability The precision obtained when measurement results are obtained by a single operator using a single method over a short timescale. A measurement is repeatable when similar results are obtained by students from the same group using the same method. Students can use the precision of their measurement results to judge this.

25 of 71

Summary of terminology

Reproducibility The precision obtained when measurement results are obtained by different operators using different pieces of apparatus. A measurement is reproducible when similar results are obtained by students from different groups using different methods or apparatus. This is a harder test of the quality of data.

Uncertainty The interval within which the true value can be considered to lie with a given level of confidence or probability – any measurement will have some uncertainty about the result, this will come from variation in the data obtained and be subject to systematic or random effects. This can be estimated by considering the instruments and the method and will usually be expressed as a range such as 20°C ± 2°C. 

Error The difference between the measurement result and the true value if a true value is thought to exist. This is not a mistake in the measurement. The error can be due to both systematic and random effects and an error of unknown size is a source of uncertainty.

Resolution The smallest measuring interval and the source of uncertainty in a single reading. 

Significant figures The number of SF used depends on the resolution of the measuring instruments and should usually be the same as given in the instrument with the fewest SF in its reading. 

26 of 71

Useful websites

https://tinyurl.com/k2z69hn

This is the Edexcel guide for students to practicals

https://tinyurl.com/n86cl7z

Unit 3 and Unit 6 of the International A Level could provide an alternative source of questions on practical techniques.

The next pages will detail the chemical tests and their results that you need to know for identifying substances. Most of these are test-tube reactions, in that you can carry them out on a small scale.

27 of 71

Chemical Analysis: Adding NaOH

Adding dilute aqueous sodium hydroxide to aqueous solutions of transition metals is a good method of distinguishing between them.The hydroxide solution is added drop-by-drop, so the transition can be seen.

Metal ion solution /Observation on adding aq NaOH /Observation on adding excess aq NaOH

chromium(III), [Cr(H2O)6] 3+ /green precipitate/ precipitate dissolves to a dark green solution

iron(II),[Fe(H2O)6] 2+/green precipitate, turning brown on exposure to air/ ppt is insoluble

iron(III), [Fe(H2O)6] 3+ /red-brown precipitate/ precipitate is insoluble

cobalt(II)[Co(H2O)6] 2+ /blue precipitate, turning pink on standing /precipitate is insoluble

copper(II), [Cu(H2O)6] 2+ /blue precipitate /precipitate is insoluble

Group 2 cations /white precipitate/ precipitate is insoluble

Group 1 cations:/  no precipitate/

28 of 71

Chemical Analysis: Adding NH3

This is similar to the last slide, however with ammonia rather than NaOH solution.

Metal ion solution /Observation on adding aq NH3 /Observation on adding excess aq NH3

chromium(III), [Cr(H2O)6] 3+ /green precipitate /precipitate slowly dissolves to a violet solution

iron(II), [Fe(H2O)6] 2+ /green precipitate turning brown on exposure to air /precipitate is insoluble

iron(III), [Fe(H2O)6] 3+ /red-brown precipitate /precipitate is insoluble

cobalt(II), [Co(H2O)6] 2+ /blue precipitate /precipitate dissolves to a brown solution

copper(II), [Cu(H2O)6] 2+/ blue precipitate/ precipitate dissolves to a deep blue solution

Notice the extra observations for copper(II), cobalt(II) and chromium(III).

29 of 71

Chemical Analysis: Test for Halides

The test for halides involves adding a solution of silver nitrate to the suspect compound. Dilute HNO3 is added first to remove (react with) any carbonate ions which would give a "false positive" (i.e. form a precipitate). Because the colour of the precipitates is quite similar, a further test involving ammonia is also used:

Anion Precipitate   Addition of dilute ammonia   Addition of concentrated ammonia

chloride, Cl− white AgCl           soluble                                 —

bromide, Br− cream AgBr         insoluble                              soluble

iodide, I − pale yellow AgI          insoluble                            insoluble

This further test, however, can't always be used, when you're trying to identify a halide ion in a complex with transition metal ions. This is as the ammonia may react with the transition metal ion and thus these results wouldn't be seen (think what would happen if you added ammonia after your silver nitrate to a solution containing copper(II)chloride). 

30 of 71

Chemical Analysis: Test for Sulfate(VI) and halide

Barium chloride or nitrate is used in the test for sulfate(VI) ions, SO4 2- . The solution to be tested is first acidified with dilute HCl, otherwise the sulfate(IV) and carbonate ions would also give a positive result. The positive result is a dense white precipitate of BaSO4.

Another test for the halide ions involves adding concentrated H2SO4, which produces visible products with different halides:

Chloride: misty fumes of HCl

Bromine: misty fumes of HBr, orange vapour of Br2 (g) and orange liquid of Br2 (l) , choking gas smell of SO2

Iodine: misty fumes of HI, purple vapour of I2(g), black solid of I2(s), eggy gas smell of H2S, choking gas of SO2, yellow solid of Sulfur S (s). 

The difference in products is due to the relative reducing ability of the halides (iodide is the best of the group).

The misty fumes could furthermore be confirmed as hydrogen halides by introducing ammonia gas, which would react to form the dense white smoke of the ammonium halide.

31 of 71

Chemical Analysis: Displacing Halides

More reactive halogens (towards the top of the group) will displace less reactive halides from solution, for example

KI(aq) + 1/2 Cl2 (g) ---> KCl (aq) + 1/2 I2 (g)

The halogens are more soluble in organic compounds such as cyclohexane than water, so if cyclohexane is added (which will form a layer on top of the (aq) solution) then the halogen that had been displaced will dissolve in this layer, as a distinctive colour -

Chlorine is pale green (displaced by F-)

Bromine is orange (displaced by Cl- , F-)

Iodine is violet (displaced by F- , Cl- , Br-)

Image result for displacement of halides cyclohexane

32 of 71

Identifying gases

When a compound is heated, it may release a gas (as it thermally decomposes) which could help to identify it. E.g., Group 2 carbonates decompose to give CO2; Group 2 nitrates to NO2 and O2; Group 1 nitrates to O2 only (except Li+, which behaves as a G2). To identify the gases (notice some of these are direct observations and some are secondary tests):

O2 - relights a glowing splint

NO2 - A brown gas

CO2 - bubble through limewater, turns milky as CaCO3 forms

H2 - A lighted wooden splint "pops" in a test tube of H2

NH3 - Turns damp red litmus blue; reacts with HCl fumes to form a white smoke of NH4Cl

Cl2 - Turns blue litmus red, then bleaches it white.

H2O - Turns cobalt chloride paper pink from blue.

H2S - A gas with a distinct eggy smell

SO2 - A choking gas

33 of 71

Chemical Analysis: Ignition

Igniting an organic compound could be one way of identifying what kind of compound it is (though it is very inconclusive).

smoky flame indicates an unsaturated compound as there is a high carbon to hydrogen ratio. Examples would be alkenes, but this is especially used for compounds containing a benzene ring.

clean flame indicates a short chained, saturated compound. These include shorter alkanes.

No residue left over suggests that the compound has a low Mr

This should be done in a fume cupboard.

Image result for benzene flame (http://pfefferlehallerlabs.yale.edu/sites/default/files/resize/images/ethanol%20vs%20benzene-500x375.jpg)

34 of 71

Chemical analysis: Identifying Organics

This is a list of tests with their positive results, and what that suggests about the organic compound:

  • Shake with bromine waterit will decolourise (orange-->colourless) this indicates the presence of alkenesIf a white precipitate also forms, this indicates the presence of phenol (The precipitate is 2,4,6-tribromophenol).A similar test for alkenes can be done with potassium manganate(VII), and the colour change is (purple--->colourless). These tests are positive as alkenes easily undergo electrophilic addition. 
  • Heat with acidified potassium dichromate, the solution turns orange to greenThis could confirm the presence of a primary or secondary alcohol, or aldehyde. Basically organic compounds that are easily oxidised.
  • Warm with ethanol and aqueous silver nitrate. A white precipitate suggests a chloroalkane, a cream is bromo- and a pale yellow is iodo-.
  • Add phosphorus(V) chloride.Acidic misty fumes forming indicates the presence of an -OH group (not just an alcohol- it could be a carboxylic acid too, for example).
  • Add Brady's reagent (2,4-DNPH). An orange precipitate forming suggests the presence of a carbonyl compound, i.e. a ketone or aldehyde.
35 of 71

Further organic tests

  • Heat with Fehling's solution, a blue solution turns to a red precipitate. This indicates the presence of an aldehyde, which is easily oxidised whilst the copper ions in the reagent are reduced from Cu2+ to Cu+ (copper(I)oxide is the ppt, Cu2O).
  • Heat with Tollens reagent; ammonia+silver nitrate. A silver mirror forming on the inside of the test tube indicates an aldehyde is present. The silver ions in Tollen's are reduced from Ag+ --> Ag(s).
  • Heat with iodine in alkaline conditions, and a pale yellow precipitate forms with an antiseptic smell. This suggests a methyl-carbonyl group is present, where a CH3 group is attached directly to the C=O group. The yellow precipitate is triiodomethane. This test is also positive for -2-ols (CH3-CH(OH)-) that can be oxidised to methylcarbonyls; therefore the test is positive for ethanal, -2-ones and secondary -2-ols. 
  • Heat with an alcohol in a water bath and a gluey smell/pear smell is evolved. This is a test for carboxylic acids.
  • Add sodium hydrogencarbonate solution, fizzing is seen. This is another test for carboxylic acids.
36 of 71

Equipment you must know

There are certain pieces of equipment you should know how to use from your experience of your core practical work. Some you will know already from previous studies, such as beakers, conical flasks and volumetric flasks, however organic synthesis apparatus (such as condensers, still heads, round-bottomed flasks) may be new.

Image result for conical flask diagramConical flasks are used for containing liquids and are particularly useful in titrations as they are shaped so that the reagents should fall back into the reaction vessel. They are not used for measuring out volumes.

Image result for beaker diagram (http://www.clipartbest.com/cliparts/7ca/6ga/7ca6gaoMi.gif)Beakers are multi-purpose but are often used for dissolving solids before addition to a conical flask. They can also be used to prepare water baths.

37 of 71

Equipment

Image result for measuring cylinder diagramMeasuring cylinders are used to measure out volumes, usually to a lower degree of accuracy than a pipette or burette. 

 Image result for volumetric flask drawingVolumetric flasks are used to measure out a set (one only) volume accurately. They have a thin neck with a graduation line. The solution should be filled up until the bottom of the meniscus rests on the line.

38 of 71

Equipment

Image result for funnel drawingA funnel is used to channel a liquid into a container and can be used with filter paper to filter the liquid. Some funnels do not have stems, so the product cannot crystallise in the stem and block it.

Image result for buchner funnel and flask diagramBuchner funnel and flasks are used to filter out a solid under reduced pressure. The flask creates a vacuum which sucks the liquid through the filter paper. The side tubing goes to a running tap, where the running water creates a suction to generate the reduced pressure. This is faster and removes more solvent than filtration under gravity (above)

39 of 71

Equipment

Image result for test and boiling tube drawingTest tubes are used to contain reagents. They can be easily bunged. Boiling tubes are similar but can be heated over a bunsen burner also.

Image result for drop pipette drawingA drop pipette is used to transfer very small volumes of fluids that do not need to be measured very accurately, e.g. to add a few drops of indicator in a titration, or to just fill a volumetric flask to the graduation line (the last few drops just as the liquid enters the thin neck of the flask).

40 of 71

Equipment

Image result for graduated pipette drawing with fillerImage result for graduated pipette drawing with filler (http://labsupply.com.au/NON-INTERCHANGEABLE/VOLUMETRIC%20GLASSWARE/VOLUMETRIC%20GRAPHICS/PPMP.jpg)A graduated pipette is used to transfer accurate set volumes of liquids by having a marked graduation line on the thin stem of the pipette. The liquid is drawn up the pipette using a pipette filler.

Image result for buretteA burette is used to measure volumes of solutions added by having a scale, often from 0 - 50cm3. (with 0 at the top) Burette measurements are taken to 2 d.p, with the last digit a 0 or 5.

41 of 71

Equipment

Image result for separating funnel drawingA separating funnel is used to separate immiscible solutions (that have formed layers). It has a tap at the bottom that can be opened to run off a layer. The bung on the top can be removed to relieve pressure if a gas is evolved.

Image result for round bottomed and pear-shaped flask diagramImage result for round bottomed and pear-shaped flask diagramPear-shaped and round bottomed flasks can often be used interchangeably. They are used for heating reagents (e.g. in reflux) and collecting products (e.g. distillation).

42 of 71

Equipment

Image result for liebig condenser diagramImage result for liebig condenser diagram (http://www.periodni.com/gallery/liebig_condenser.png)A condenser is used to cool a gas back to a liquid. It can be fitted upright over a reaction vessel when a volatile is being heated under reflux (continual heating and condensation,) or near-vertical as a side-arm condenser when a product is being condensed and collected in distillation. Water is pumped into the bottom and out through the top of the condenser. Ensure the bottom of the condenser is fully in your reaction vessel or still head so the gases don't escape.

Image result for still head diagramA still head is used to connect a side-arm condenser to the reaction vessel in distillation. The top may be bunged, with a thermometer.

43 of 71

Equipment

Related imageA receiving head/adaptor is used to connect the end of the condenser to the receiving flask (where the distillate ends up) in distillation. It has an open end to relieve pressure

Image result for crucible diagram (http://www.thesciencesite.co.uk/wp-content/uploads/2016/03/change2.gif)A crucible is a small, lidded ceramic pot used for heating substances, such as in thermal decomposition. They are initially heated gently to reduce the risk of the contents spitting out.

44 of 71

Equipment

Image result for mortar and pestle diagram
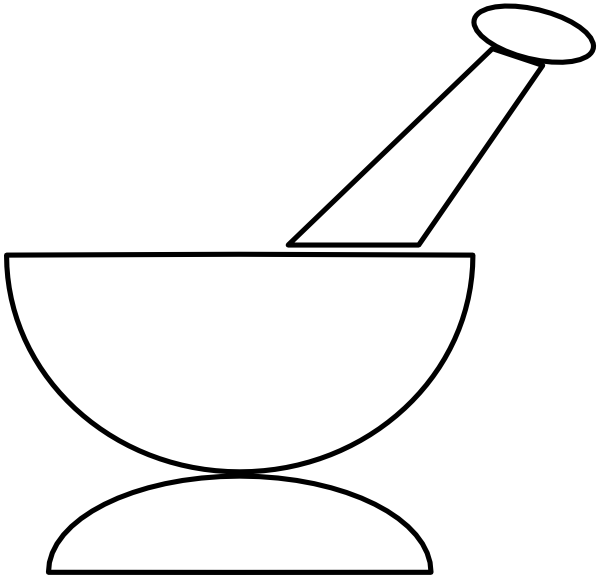
A mortar and pestle are used to grind up solids into a powder

Image result for evaporating dish diagramEvaporating dishes are wide, shallow dishes used for drying (e.g. salts). A watch glass (slightly curved piece of glass) may also be used. 

Image result for tongs diagram chemistryTongs can be used to move hot beakers and test tubes

Image result for nichrome loopA nichrome loop is used to transfer small volumes of solid to a flame in flame tests

45 of 71

Equipment

Image result for tripod with gauze diagram
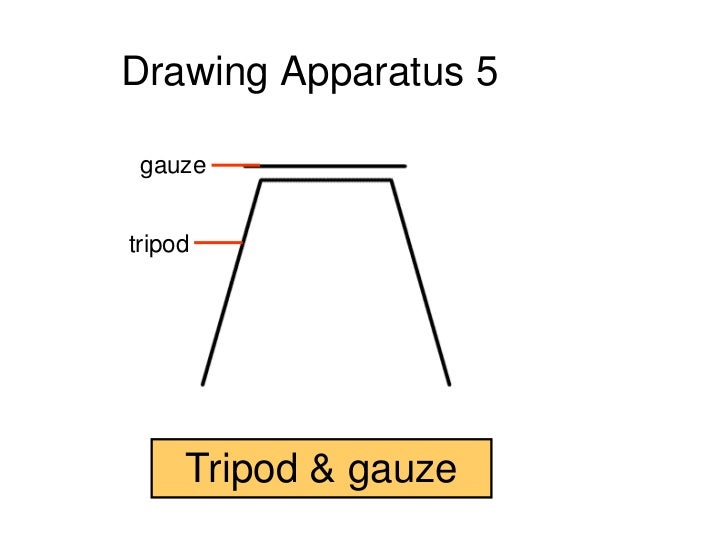
A tripod with a heat-proof gauze is used to support a beaker being heated by a bunsen burner. The tripod and Bunsen burner are placed on a heat proof mat

Image result for bunsen burner drawingA Bunsen burner is used as a source of heat. When the collar is "open", the flame is hotter (more oxygen) and blue, also known as roaring or non-luminous. When closed, it is a yellow "safety" flame (much more visible). Often in a diagram, you could represent a bunsen burner as an arrow labelled "heat". They should not be used (at least not without a water bath) around flammables.

46 of 71

Equipment

Image result for lab fractionating column (http://www.chemguide.co.uk/physical/phaseeqia/apparatus.gif)A fractionating column is a column packed with glass beads used in distillation. As the gases rise through the column they condense and vaporise several times on the surface of the beads, thus providing better separation.

47 of 71

Maths for Chemists

Some of the most fundamental calculations chemists need to be able to do involve moles, or amounts of substance. The key equation is:

moles (mol) = Mass(g) / molar mass (gmol-1)

The molar mass of a substance, its Mr, is equal to the sum of the Ars (atomic masses) of the elements that make it up; the weighted mean mass of the element compared to 1/12 mass of a carbon-12 atom. This is taken to be equal to the larger number seen on the periodic table, usually the mass number. 

To calculate numbers of atoms from this, the number of moles needs to be multiplied by the Avagrado constant,  6.02 × 10 23 :

Number of atoms/ions = no. moles x 6.02 x10^23  x no. atoms or ions in the compound

For example, in 0.3 moles of MgCl2 there are

0.3 x 6.02x10^23 x 3 = 5.418x10^23 ions

48 of 71

Concentration calculations

Concentration in moldm-3 is found by

moles(mol)/volume(dm3)

which can be rearranged to moles = concentration x volume

Often volume is given in cm3, which needs to be divided by 1000 to convert to dm3. (A conversion to m3 would involve a further division by 1000). Therefore

moles = concentration x (volume/1000)

This is very often the first calculation done in a titration question, where the moles and titre volume of one of the reactants is known. Mole ratios can then be used to find the moles of the other reactant.

To convert from moldm-3 to gdm-3, multiply the concentration in moldm-3 by the Mr of the substance referred to.  If a question refers to mgdm-3; where mg is equal to g x10 ^ -3 , the answer would need to be multiplied by a further 1000. (x10^3)

49 of 71

Molar volumes and amounts of liquids

The molar volume of a gas at r.t.p (room temperature and pressure) is 24dm3. This means, that 1 mole of any gas will occupy 24dm3 under these conditions. Therefore, the moles of a gas can be found by

volume of gas in dm3 / molar volume of gas in dm3

--

If a product is a liquid in a reaction but you want to use moles = mass/Mr to find the number of moles of the liquid, you will probably need to know its density:

density(gcm-3) = mass(g)/volume(cm3)

so mass(g) = density (gcm-3)  x volume (cm3)

This value of the mass can then be put into the moles equation.

Notice that sometimes it is common to use dm3 for volumes, and sometimes cm3 is preferred (tends to be more practical when small volumes of gas are involved, as is the case in many lab experiments). However, sometimes even m3 are used...

50 of 71

pV=nRT - Ideal Gas equation

pV=nRT

Is a key equation you must remember. It links pressure, volume, moles, the ideal gas constant and temperature. The most important thing to remember is that all units are in SI. These are the standard (metric) units; such as metres, seconds, Kelvin; and are generally preferred by physicists (who would be less likely to use dm3, for example).

 Thus the units are:

pressure - Pascals, Pa,(one newton per square metre)

volume - metres cubed, (where cm3 x 10^-6 = m3 ; e.g. 11cm3 = 1.5x10^-5 metres cubed. Think about the fact that metres are 100 times, or x10^2, larger than centimetres, however as this is a volume the scale factor is taken to the power 3, where (10^2)^3 = 10^6) )

moles - moles

Gas constant (R) - 8.31 m3PaK-1mol-1 (this is given in the formula booklet).

temperature - Kelvin (temperature in centigrade + 273 = temperature in Kelvin)

51 of 71

Yields and economies

Percentage yield is the amount of product that you obtained as a proportion of the theoretical total, calculated using moles equations; so

(actual yield / theoretical yield )  x 100

Yield will never be calculated to exceed 100%, except if a product contains impurities or is not dry (e.g. crystal preparation). Yield is often less than 100% due to a number of factors, such as reactions that don't go to completion (equilibrium), unexpected side reactions (e.g. incomplete combustion producing CO), product lost on apparatus (e.g. in filtration)

Atom economy refers to the amount of products of a reaction that you actually want (useful products), expressed as a percentage of the molar masses:

(Mr of product you want / Mr of all products )x 100

It does not depend on experimental values of any kind. Even an experiment with 100% yield does not necessarily have a 100% atom economy, and vice vera. An example of a reaction with 100% atom economy is addition polymerisation. In practice, 100% yield is very difficult to achieve.

52 of 71

Using logarithms

Logarithms are the inverse function of powers. For example, you could not easily solve the equation 10^x = 0.865, for example without using logarithms. To solve this equation, you need to do log10(0.865) = -0.063 to 2s.f. This is taking log to the base ten of 0.865. The conversion can be written as

a ^x = b      <---->    loga(b) = x

 The "log" button on your calculator is log10, log to the base ten, which is a common logarithm used. For example, log(100) = 2 ; log(10000) = 4 ; etc. This is saying that 10^2 = 100 and 10^4 = 10000. By converting numbers which have large gaps between them to logs can make scales easier to draw. For example, in year 1, successive ionisation energies were plotted as logarithms. If you tried to draw a good scale to plot the numbers 577.5 kJmol-1; 1816.7 kJmol-1... all the way through to 222315 kJmol-1, (these are the ionisation energies of Mg), it would be very difficult! 

Instead, log(577.5)=2.75 ; log(1816.7)=3.26 log(222315)=5.35 . These would be much easier to plot on a scale!

Another part of chemistry that uses logs is pH.

53 of 71

Logarithms

You will know from Topic 12 that

pH = -log[H+] ; where [H+] is the concentration of hydrogen ions, and the "log" is to the base 10. As [H+] can take a massive number of values, ranging from around 1moldm-3 down to 1x10^-14 ; it is much more practical to convert this into a scale from 0-14. 

Remembering the equation from the last slide, if

pH = -log10([H+]) Then, dividing by -1 ;  -pH = log10([H+])  and so 10^(-pH) = [H+]

An important thing to realise is that you cannot take logs of negative numbers. This means, for log base 10, that 10^x can never be a negative number (which makes sense; 10 is a positive number). If you take a log of a number that is greater than zero (i.e. positive) but less than 1, the answer will be negative. This makes sense again, for example consider

log(0.1) = -1    ; as 10^-1 = 0.1  . You may know from GCSE maths that taking a negative power gives a reciprocal answer (1/answer), e.g.

10^-2 = 1/10^2 = 1/100 = 0.01 . Thus following this reasoning, taking logs of proper fractions will give a negative number.

54 of 71

Negative logx

Image result for graph of log x (http://www.rapidtables.com/math/algebra/logarithm/log-graph.png)

This is the graph of log10(x). As you can see, the value of x cannot be negative, but the value of logx can be (see the last slide). Notice the x-intercept is (1,0), as log10(1) = 0. In fact, log(1)= 0 for all bases (i.e. not just ten). This is as anything the power of 0 is 1. 10^0 = 1.  

Notice the graph is asymptotical to the y-axis. To make logx more negative, x has to get closer and closer to 0, but it won't reach it. This is as 10^x can never equal 0. 

55 of 71

lnX

This is important for our consideration of lnX. lnX is the natural log, that is log to the base e. e is an irritational constant approximately equal to 2.718. One significance of e is that its gradient function of the graph e^x is equal to the graph of the function. This could be said in easier terms as the gradient at any point is equal to the y value for that point. (dy/dx = y )

Treat e in the same way that 10 was for log. For example, e^x = 4 would be solved by ln4 = 1.39.

e comes up in rates, for example in the Arrhenius equation:

k = Ae ^ (-Ea/RT)

Image result for arrhenius equation (http://www.chemguide.co.uk/physical/basicrates/arrhenius1.gif)

56 of 71

Rearranging Arrhenius

Logs of base e, lnX, can be taken of both sides of the equation:

lnk = ln(Ae^(-Ea/RT))

as, in general, ln(AB) = ln(A) + ln(B) (this is a log rule); therefore:

lnK = ln(A) + ln(e^(-Ea/RT))

However, ln(e^(-Ea/RT)) is an expression basically saying e^x = e^(Ea/RT) (lne = 1, for example, as e^x = e must mean x =1) - i.e., the two functions are inverses of each other - taking lne would be like taking the square root of 10 squared. Therefore this can be written as

lnK = ln(A) + -Ea/RT

This is an equation in the form y = mx + c  (the formula of a straight line). Therefore, if lnK is plotted on a y axis, and 1/T on the x axis, then the gradient will be Ea/R.

You will not be expected to do the rearrangement in an example, but you could be asked to find ln of K values, and plot the graph.

57 of 71

ΔStotal ; lnK ; E Cell

ΔStotal is propotional to lnK and E Cell.

This means, that for a reaction to be feasible:

ΔStotal must be positive

lnK must be positive

E Cell must be positive.

Looking at lnK - what does this mean about K? If lnK is positive, this means K is greater than 1. If lnK is negative (i.e. in a non-feasible reaction, as ΔStotal would also be negative and E-Cell) then K is less than one, but greater than 0. (Remember that K cannot be negative!)So: If  0 < K < 1 ; a reaction is unfeasible and the equilibrium lies to the leftIf K>1 , then the reaction is feasible and the equilibrium lies to the rightYou can imagine a K value of 1 is when the equilibrium position lies perfectly in the middle. An equilibrium value of 0 is impossible as it would suggest NO reaction occurs at all, which is also not observed. A negative K value couldn't make sense.

58 of 71

Plotting Graphs

Here are the key points of plotting a graph in an exam:

  • The independent variable (i.e the one you change) goes on the x-axis. For example, if you were measuring the volume of CO2 evolved when different masses of calcium carbonate were reacted with acid, then the mass of carbonate is the independent variable. 
  • The dependent variable (the variable that depends on the independent variable) goes on the y-axis.
  • Your scales should allow for at least half of the graph paper given to be used - so don't make your scales too large. However, it is most important that the scale is easy to read. A scale that goes up in 4s per every square of graph paper is more spread out than one that goes up in 5s, however, 5s are usually easier to read and interpret.
  • Consider whether you need an origin or not. You don't always need one; your data may not begin or end near 0. However, if you need to find a y-intercept, then it is important that your scale allowed for your plotted graph to cross the y-axis 
  • Label your axis with your quantity, followed by the units, for example (time/s) or (volume/dm-3)
  • Consider whether the plots should have a line of best fit (linear relationship, use a ruler - e.g., a zero order reaction for a concentration/time graph) or a curve (draw a solid, continuous curve freehand.) Also, consider the extent of your line - in the 2017 paper, marks were lost for not extending to the origin (it was important to show the data should plot through (0,0) in that instance).
  • Use a sharpened pencil to plot your points as small crosses.
59 of 71

Summary: The 12 practical techniques

1. Use appropriate apparatus to record measurements

  • To measure a mass transferred accurately, measure the mass of the container with the solid and again after the solid has been transferred. The difference is mass is the mass transferred. This means that you won't be recording the mass of any solid that remains on the weighing boat/bottle.
  • Remember that measurements often have two absolute uncertainties - for a mass balance, this could be between the 0.00g and the recorded mass; for a thermometer, this could be a final and initial temperature change in an enthalpy reaction.
  • To reduce parallax error (error caused by the difference in the appearance of something depending on where you observe it from; the key example is burette readings) make sure you read consistently from eye-level. This applies to analogue thermometer readings too.
  •  Consider what apparatus is appropriate. For small, accurate volumes, a graduated pipette or burette may be needed; for transferring a volume that is in excess a measuring cylinder may be accurate enough. Remember for following the progress of a reaction different techniques can be used - if a gas is evolved and it is dense, with a high Mr - e.g. CO2 - mass loss can be measured (on a 2 d.p. balance). For a low Mr gas, a gas syringe to measure the volume evolved will be better (the mass change would be too small). The downward displacement of water could also be a technique to measure volume, but remember some gases are soluble in water (such as HCl) so this wouldn't be appropriate.
60 of 71

Summary: Practical technique #2

2. Use a water bath, electric heater or sand bath for heating.

Related image (http://www.rsc.org/learn-chemistry/Content/FileRepository/frg/images//addition%20polymerisation%20image%201.JPG)Image result for heating mantle

A water bath can be as simple as a large beaker of water, which is either heated in a kettle or over a bunsen burner on a tripod. A boiling tube can be then placed in the beaker. A heating mantle or electric heater can be used to heat a container filled with sand. It provides a more even heating for a container compared to exposing to heat from below. These methods are usually used when a direct naked flame is not favoured, or if the temperature has to be more controlled, for example, if a substance is flammable or decomposes as high temperatures.

61 of 71

Summary: Practical technique #3

3. Measure pH using pH charts, or pH meter, or pH probe on a data logger.

Image result for ph probe

A pH probe is used to measure pHs of solutions, as in CP9 (Ka of a Weak Acid). The probe is kept in a buffer solution when not in use, and washed with deionised water and dried between measurements (so the solution does not remain on the end of the probe). It can be calibrated by finding meter readings of solutions of known pH, usually buffer solutions, and plotting a graph of meter readings against the pH (to give a calibration curve).

Remember when carrying out titration curve questions that near the equivalence point the volumes being added should be drastically smaller (e.g, only add 0.5cm3 at a time compared to 5cm3). This is as the pH will begin to change rapidly as it falls into the "steep section" of the pH curve.

62 of 71

Summary: Practical technique #4

4. Use laboratory apparatus for experimental techniques including (i) titration (ii) distillation and reflux (iii) tests for ions and organic functional groups (iv) filtration under reduced pressure and gravity

(i) - Covered on cards 16-17. The key apparatus are the burette (vertical, tip filled, funnel removed, washed with solution first, tip inside neck of conical flask) pipette, and conical flask (swirl, wash down any splashes with deionised water). Remember the other good practice measures like using a white tile, adding only a few drops of indicator and repeating for concordant results.

(ii)- Covered on cards 7,8,9; and 6. Important to remember for distillation that it is sealed in the still head and that the thermometer bulb in the still head is opposite the condenser mouth. The receiver adaptor is not sealed. In reflux, the condenser is not sealed. Use antibumping granules.

(iii) - Covered on cards 28-36. 

(iv) - Covered on card 14. 

63 of 71

Summary: Practical technique #5

5. Use volumetric flask to make a standard solution

This was covered on card 23. A summary of the standard solution steps:

  • Use the reweigh technique to accurately find the mass of solid added. The solid is your primary standard. Some key qualities of the primary standard is that is is a solid with a high Mr, it has a high degree of purity, it does not react with air or decompose in air, it doesn't absorb water from the atmosphere (hygroscopic), it is soluble, is not efflorescent and will react completely in titrations.
  • The solid is dissolved in a beaker with deionised water, stirred (sometimes heated, then left to cool) to dissolve completely. 
  • This solution is transferred to the volumetric flask using a funnel. The rod and beaker are both washed and these washings transferred to the flask also. Finally, the funnel is also washed with deionised water, into the flask. This is to ensure all moles are transferred.
  • Deionised water is added up to the graduation mark - the last few drops are added with a drop pipette
  • The bottom of the meniscus of the solution must be on the graduation line at eye level.
  • The flask is stoppered and inverted slowly, several times, to ensure even concentration.
64 of 71

Summary: Practical technique #6

6. Use acid-base indicators for weak/strong acid/base titrations.

Image result for indicator pkin chart (http://www.chemistry-assignment.com/wp-content/uploads/2013/02/1107.png)

In a weak acid-strong base titration, you want an indicator which changes colour at higher pHs, as the pH will be >7 at equivalence. To find the colour change pH, look at the pKin values. E.g., phenolphthalein (9.4). So, for a strong acid-weak base, you'd want an indicator whose pH range is at a low (acidic) pH, such as methyl orange. For a suitable indicator, the pH range has to fall in the "steep" or "vertical" section of the titration curve, when the pH changes rapidly over less than a cm3. Rember that universal indicator is not used as it has a spectrum of colours rather than a sharp colour change.

65 of 71

Summary: Practical technique #7

7. Purify (i) solids by recrystallisation (ii) liquids using separating funnels.

(i) - Covered on card 13. Key points - first filtration (HOT) removes insoluble impurities. Second filtration (COLD, under reduced pressure) removes soluble impurities. Washing the solid product with a little cold water removes soluble impurities that may crystallise with the product. Also: minimum and hot are the keywords when referring to the solvent; minimum - so the solution is saturated, and thus more product crystallises out &less stays in solution; hot - for maximum solubility.

(ii) Solvent extraction and washing are covered on cards 10 and 11 respectively. Drying using a drying agent such as MgSO4 is also a method of purification - water can also be a contaminant. In using a separating funnel is it important to realise which layer contains your product by using its density. Also, when draining a layer out of the funnel, the bung must be removed from the top. This is as, if it was left in, the displacement of the liquid would eventually mean the pressure on the inside of the flask would not equal that of the outside and the liquid would stop draining out as it would be effectively held in by suction. Remember to relieve pressure during reactions by removing the bung at regular intervals or inverting the funnel and opening the tap. For example, when sodium hydrogencarbonate is used to neutralise excess acid, the bung needs to be removed to prevent build up of CO2.

66 of 71

Summary: Practical technique #8

8. Use melting point apparatus

Covered on card 15. Melting point apparatus can, of course, only be used for solid products - if you have a liquid, use distillation apparatus.

Image result for simple melting point set up (http://what-when-how.com/wp-content/uploads/2011/06/tmp30120_thumb13.png)Related image (http://www.yaksic.com/ispp2_02.jpg)

67 of 71

Summary: Practical technique #9

9. Use thin-layer or paper chromatography

This is a technique that can be used to identify amino acids, by calculating Rf values. In paper chromatography, small spots of each sample are placed along a pencil-drawn line near the bottom of the chromatography paper. This paper is then placed in a beaker in a layer of solvent, which does not reach the pencil line. It should be perfectly parallel to your pencil line. The beaker is sealed (a "chamber" - to prevent evaporation of the solvent) and left until the solvent is a few cm from the top of the paper. It is then removed, and the final line of the solvent drawn on in paper. If the solutions were colourless (e.g. amino acids), they can be developed once the solvent is dried - such as with ninhydrin. To find the Rf value, the calculationdistance travelled by mixture/distance travelled by solvent (from the baseline - the pencil line) is used.

Thin-layer is very similar, however, the stationary phase is silica on a glass plate.Image result for paper chromatography setup amino acids (http://www.chemguide.co.uk/analysis/chromatography/tlc1.gif)Image result for paper chromatography setup amino acids

68 of 71

Summary: Practical technique #10

10. Setting up electrochemical cells and measure their voltage.

The key conditions for the electrochemical cells are:

  • If the cell is under standard conditions, then: -all ions in solution are at 1.0moldm-3 -the temperature is 298oK -the pressure of any gas is 100kPa (1 bar)
  • The salt used in the salt bridge is usually potassium nitrate. These ions are unlikely to interfere with the ions in the cell (i.e. form precipitates)
  • The voltmeter should be high resistance to reduce electron flow to the external circuit (so the emf can be measured).
  • If there is no metal electrode, (i.e. all are ions in solutions or gases) then a platinum electrode covered in porous platinum is used as the electrical contact (non-reactive).
  • There is no ammeter or cell in the circuit. Remember, the electrochemical setup IS the cell!Image result for electrochemical cell standard conditionsImage result for electrochemical cell standard conditions hydrogen electrode (http://www.chemguide.co.uk/physical/redoxeqia/eomgdiag.gif)
69 of 71

Summary: Practical technique #11

11. Safely handle solids and liquids, including corrosive, irritant, flammable and toxic substances.

Covered on cards 3,4 and 5.

  • Corrosive - potential to cause burns to skin and eyes. Wear gloves, goggles, lab coat. If volatile - carry out in fume cupboard
  • Irritant - potential to cause inflammation to skin, eyes, throat. Wear goggles, gloves, carry out in fume cupboard or well-ventilated room
  • Flammable - potential to start a fire. Don't use near a naked flame; use a water bath or electric heater instead. If it is volatile, use in a fume cupboard to remove fumes.
  • Toxic - poisonous - could cause illness or death on contact, inhalation or ingestion. Wear gloves, goggles, lab coat, use in fume cupboard if volatile or a fine powder.

Put stoppers back into bottles when not in use, clear up spillages immediately, keep away from table edges etc are other common sense measures.Image result for chemistry pictograms with control measures (http://weill.cornell.edu/ehs/static_local/images/GHSpictogram.jpg)

70 of 71

Summary: Practical technique #12

12. Measure reaction rates by (i) initial method (ii) titrimetric method.

(i) The initial rates method is the "clock" reaction. This is when a reaction is followed by having several reaction vessels with different concentrations of reagent, to measure their effect on the rate. The vessels will also contain a fixed amount of another reagent which reacts with a product as soon as it is formed, until the reagent it is used up. This product will then suddenly be present and will cause a sudden change in an indicator, and the "clock" - which measures the time from when the reagents are mixed until this point - is stopped. The key example is the iodide-peroxidisulfate reaction. The reaction forms iodine, which reacts with a set amount of thiosulfate present. However, as soon as the thiosulfate runs out, the iodine is no longer used up and the indicator - starch solution - turns blue-black. By varying the volumes of iodide and peroxidisulfate, the rate wrt to them can be measured.The total volume should remain constant for all the vessels as a control (so concentrations are constant) so water may need to be added to make it up. The term "initial rates" comes from the fact that the initial rate is estimated from 1/t ; where t is the time for the indicator to change. If there is no significant change in rate during this time, it can be assumed that the average rate of reaction will be the same as the initial rate. The initial rate is then proportional to 1/ t . However, this assumption may not be valid for large values of t.

(ii) A titrimetric method involves just one reaction vessel. In this method, a reaction (that is fairly slow) is occurring in a beaker, and a timer set. At regular intervals (e.g., every 5 minutes) a sample of the mixture is removed and quenched - the reaction in that sample is stopped or slowed. This could be by removing a catalyst (e.g., neutralising an acid catalyst with NaHCO3) or placing in ice to slow the rate. This portion of the solution (called an aliquot) is then titrated with another reagent, to find the concentration of one of the reactants in the reaction. By doing this regularly, a graph can be plotted of concentration against time, to find the order wrt that reagent. A linear relationship suggests a 0 order reaction, as rate is constant. A curve with a constant half-life is a 1st order, and a half-life that doubles every time is 2nd order. Note that one of the reagents in the reaction must be in a large excess so its concentration remains effectively constant, so only the rate wrt the other reactant is measured.

71 of 71

Comments

Zaynab123.

Report

thank ya x 

Onopio1

Report

I can't print this nor get the printable pdf version?? 

LouiseG

Report

Sorry I don't have any control over that :( 

Abdus Saboor

Report

Thank you so so much for this Louis. This is a lie saver!!! Thanks !!!! God bless you !!!!!

SydShane

Report

Lol LouiseG you hero, thank you for this resource to cram before Wednesday :))

Similar Chemistry resources:

See all Chemistry resources »See all Reactions resources »